
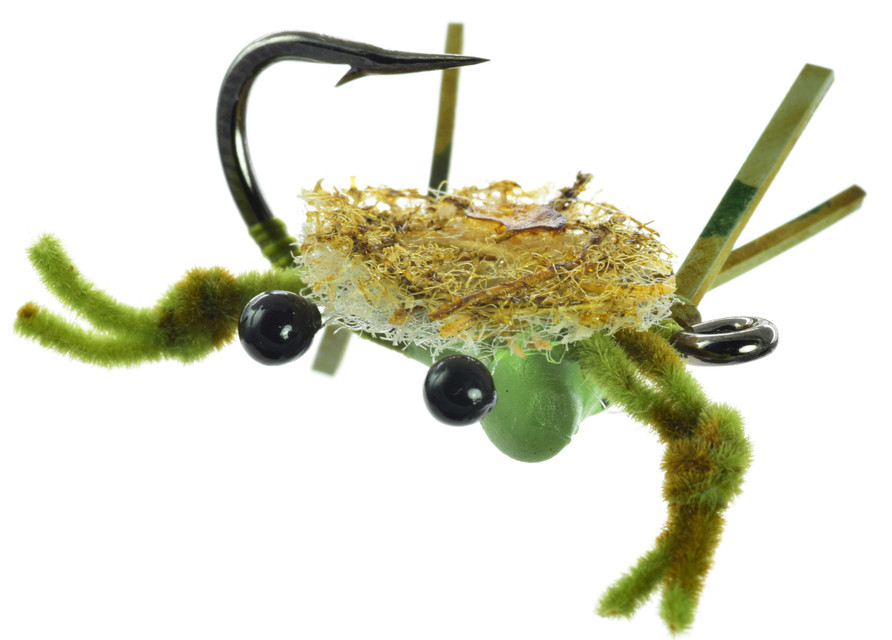
How to Tie the: Contraband Crab
Materials
Hook:Black Gamakatsu L11s-3H, size 6
Thread: Olive Danville 210 denier Flat Waxed Nylon
Eyes: 5/32nd black nickel brass dumbbell; large black
EP Shrimp & Crab Eyes
Legs: Large gray square rubber
Claws: Olive Micro Chenille
Body: Tan Scotch-Brite, Greener Clean Non-Scratch Scour Pad
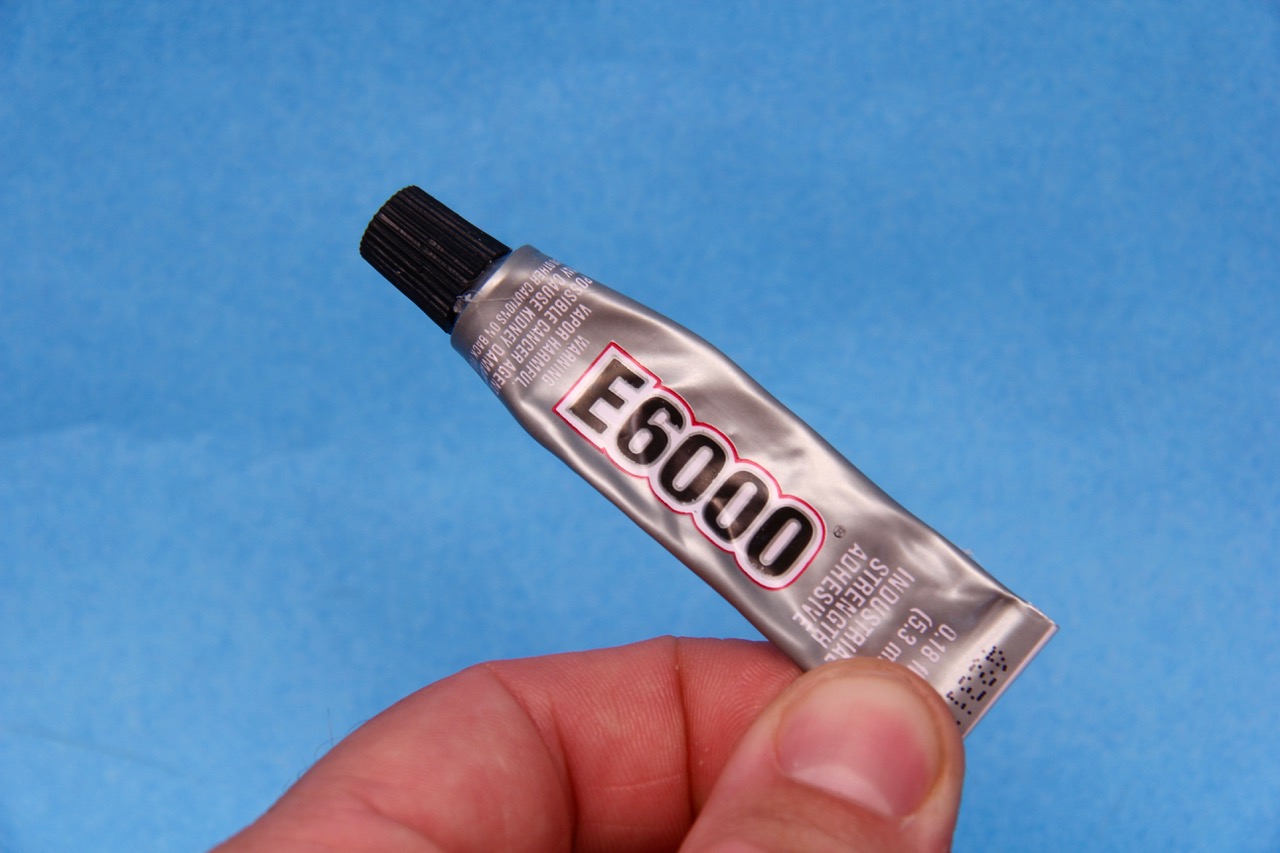
Adhesive: Clear e6000 Glue; White Tulip Fabric Paint
Marker: Copic YG95 Pale Olive for body); Copic E57 Light Walnut for claws
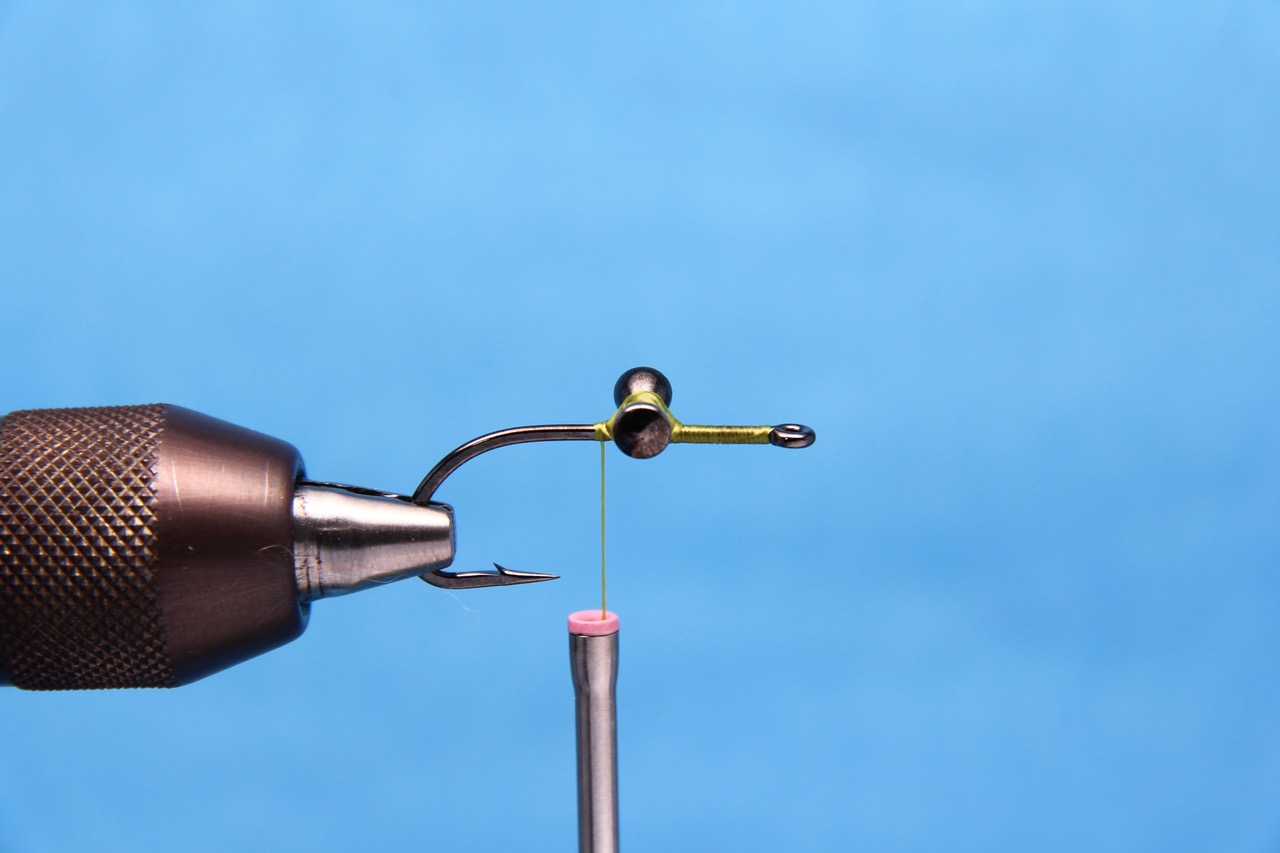
Step 1:
Start the thread at the eye of the hook and wrap backward, creating an even thread layer ending in the middle of the hook shank.
Step 2:
Tie in dumbbell eyes with a series of tight figure-eight and doughnut wraps.
Step 3:
Continue wrapping toward the bend, covering the entire hook shank with an even layer of thread. Once you reach the bend of the hook, advance the thread back to the eye. This layer of thread will provide a better bond when gluing the body of the crab to the hook assembly.
Step 4:
Whip finish at the eye of the hook, cut away the thread and set the prepped hook aside. I like to tie up several of these in advance to save time.

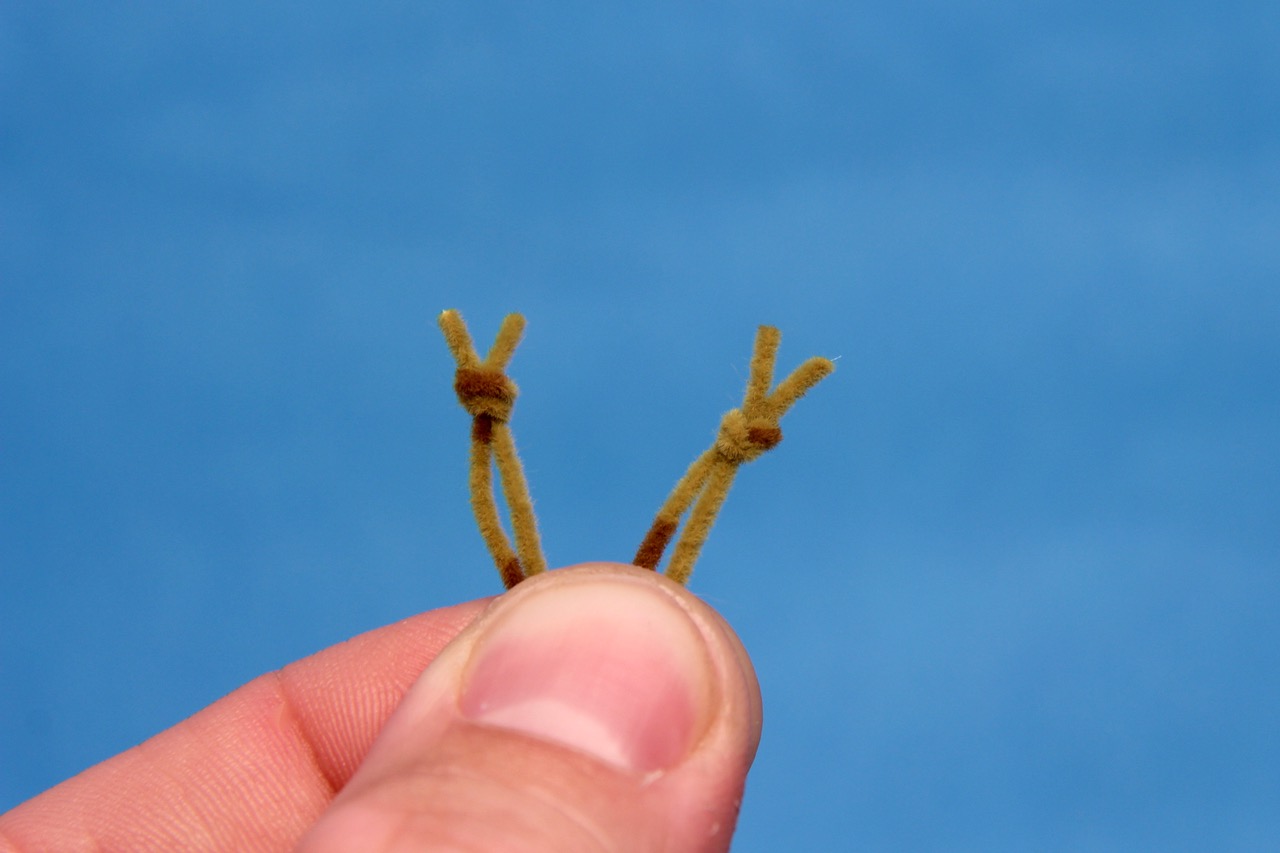
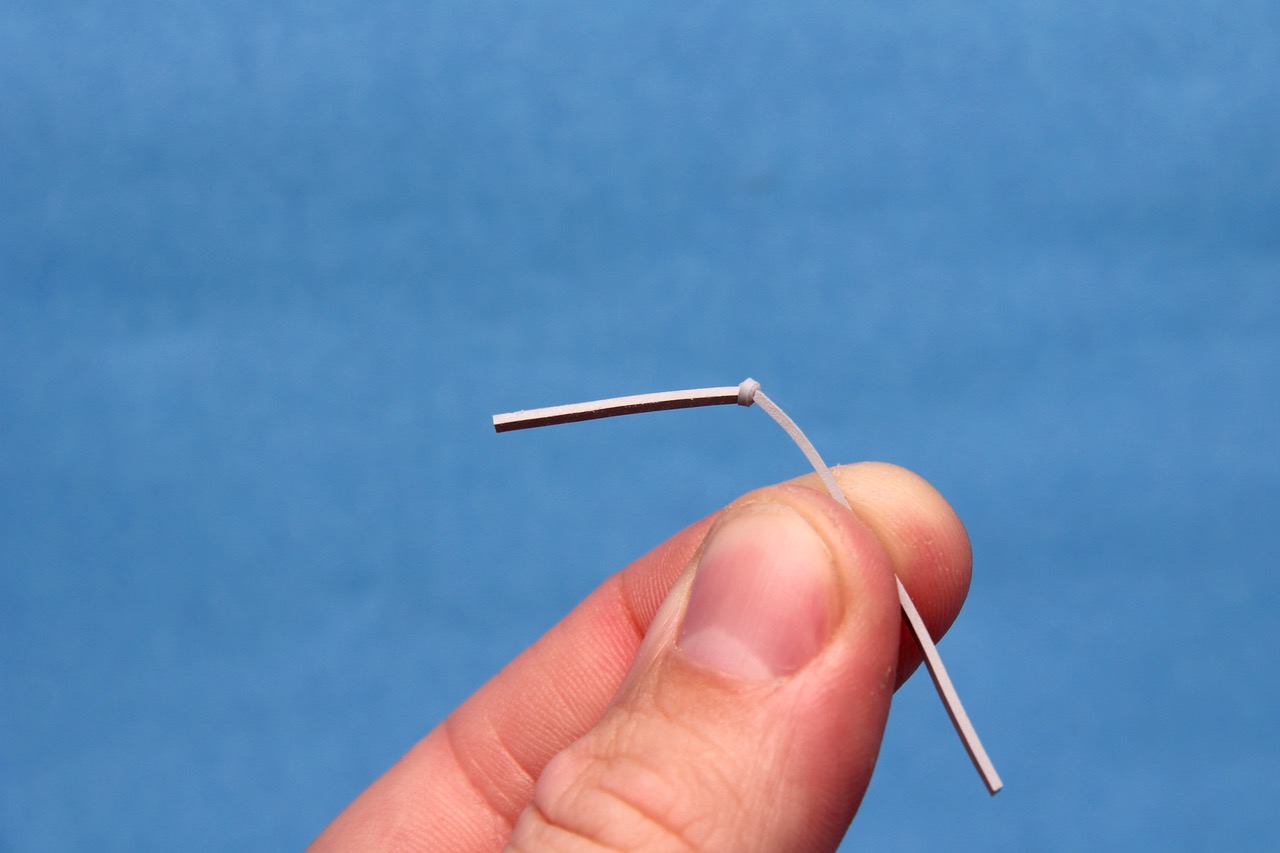
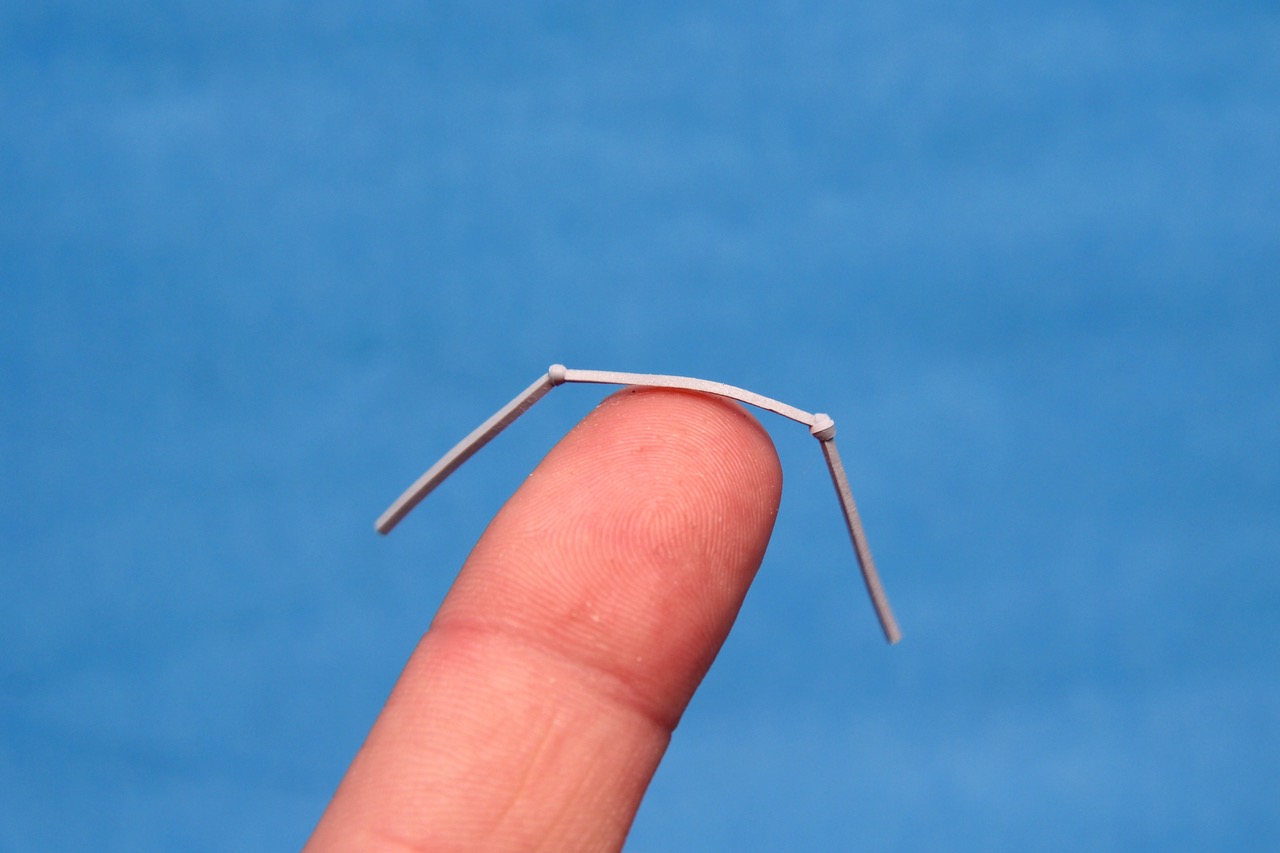
Step 5:
Fold two three-inch pieces of chenille in half and tie a knot about a quarter-inch from the folded end. Cut the loops to create claws. Mark with a brown or olive permanent marker for a mottled look.
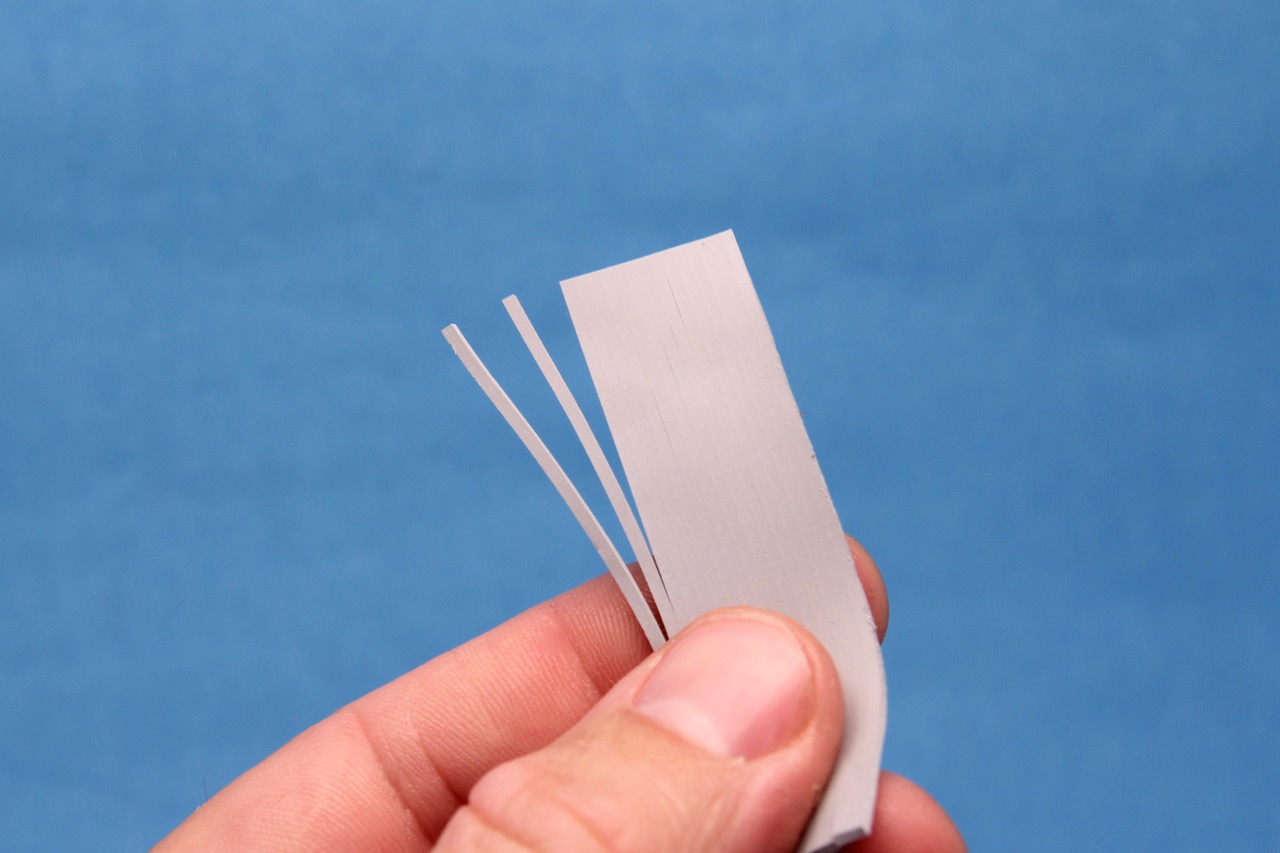
Step 6:
Cut a two-and-a-quarter-inch section of square rubber legs. Separate two legs from the strip.
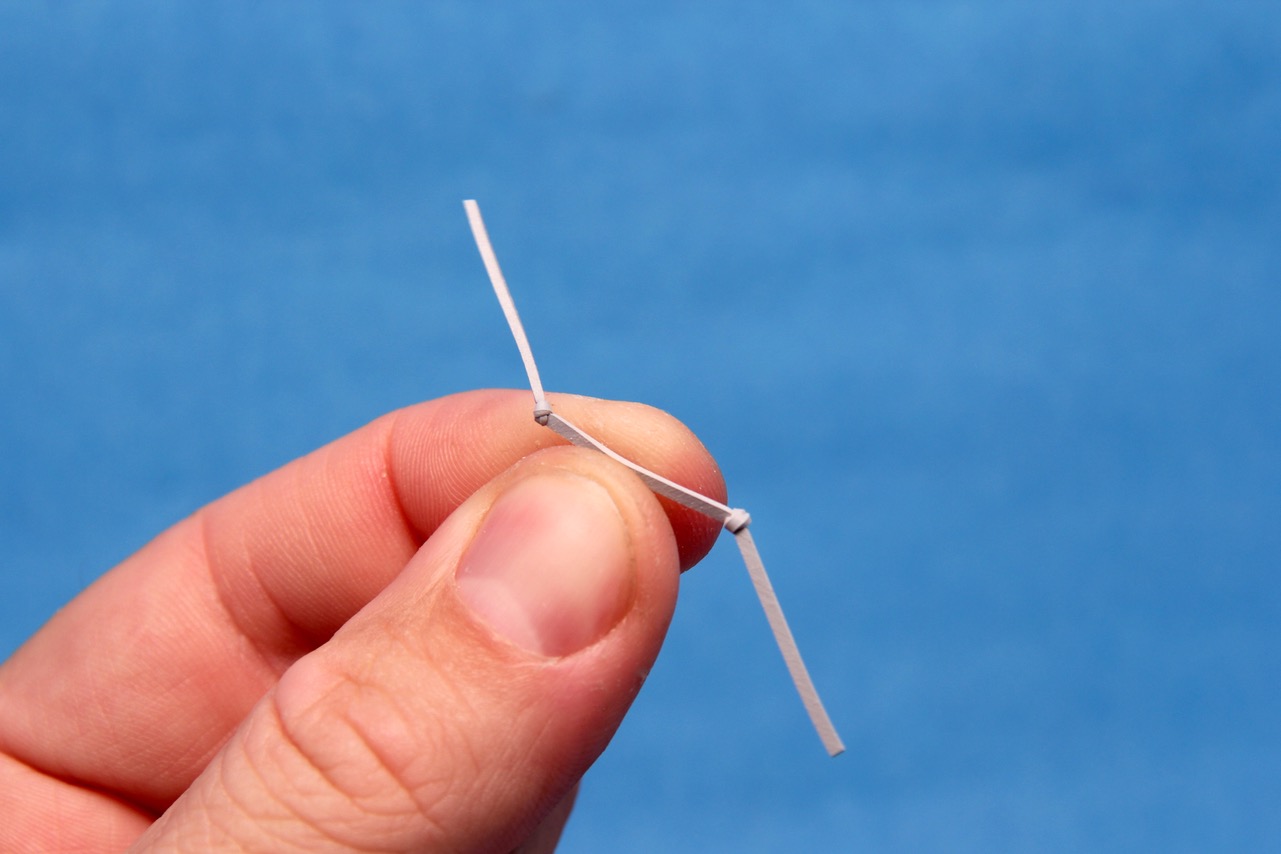
Step 7:
Tie an overhand knot approximately three-quarters of an inch from one end.
Step 8:
Tie a second knot on the other side of the leg, approximately three-quarters of an inch from the other end. More than likely, the segmented portions of the leg beyond the knot will be facing in different directions, and that is okay.
Step 9:
Roll one or both of the knots until the segmented portions of the legs are approximately the same length and are pointing in the same direction. Repeat on the second leg. Do your best to make the knots on the second leg slightly closer together than the first. This is very difficult to achieve and maintain with any kind of consistency using a round rubber leg or thinner flat silicone leg. This is why the square rubber legs are so important.
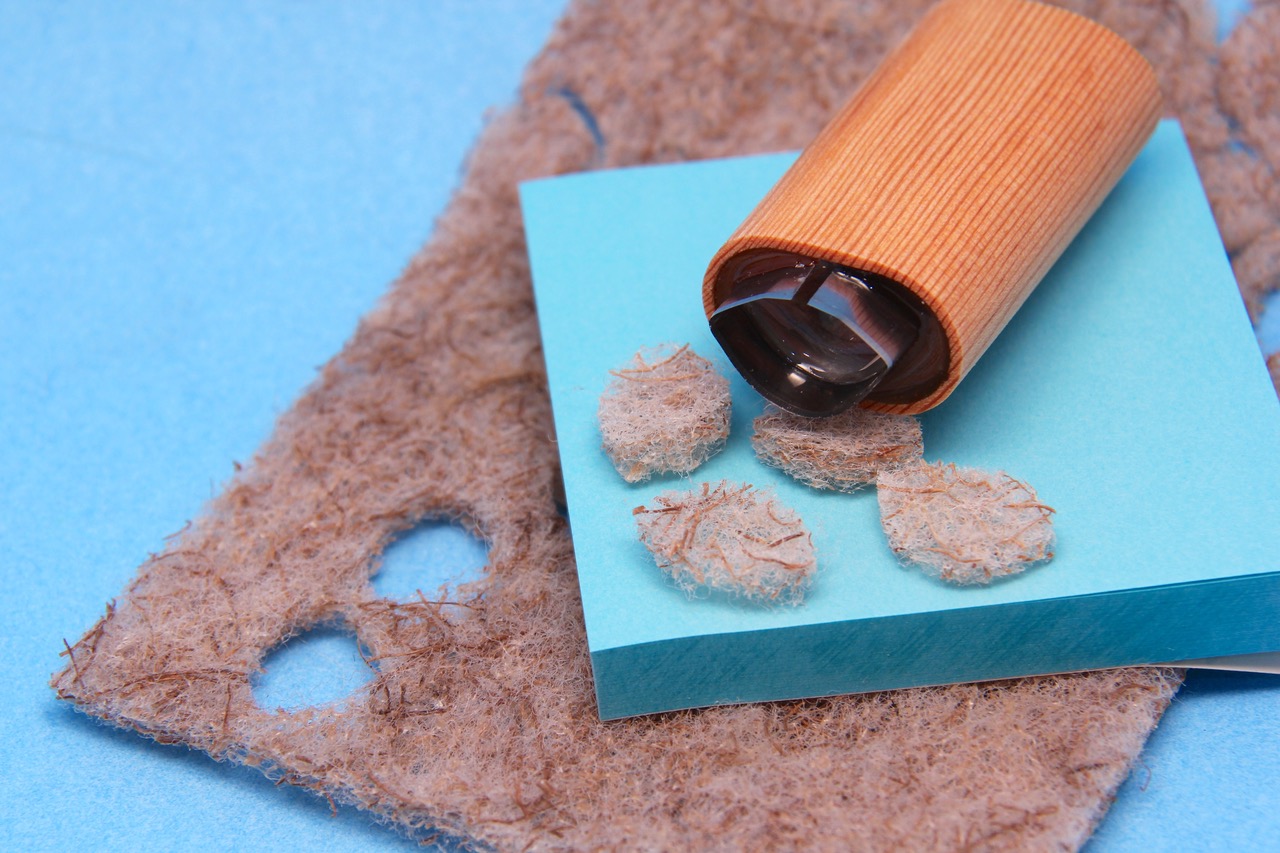
Step 10:
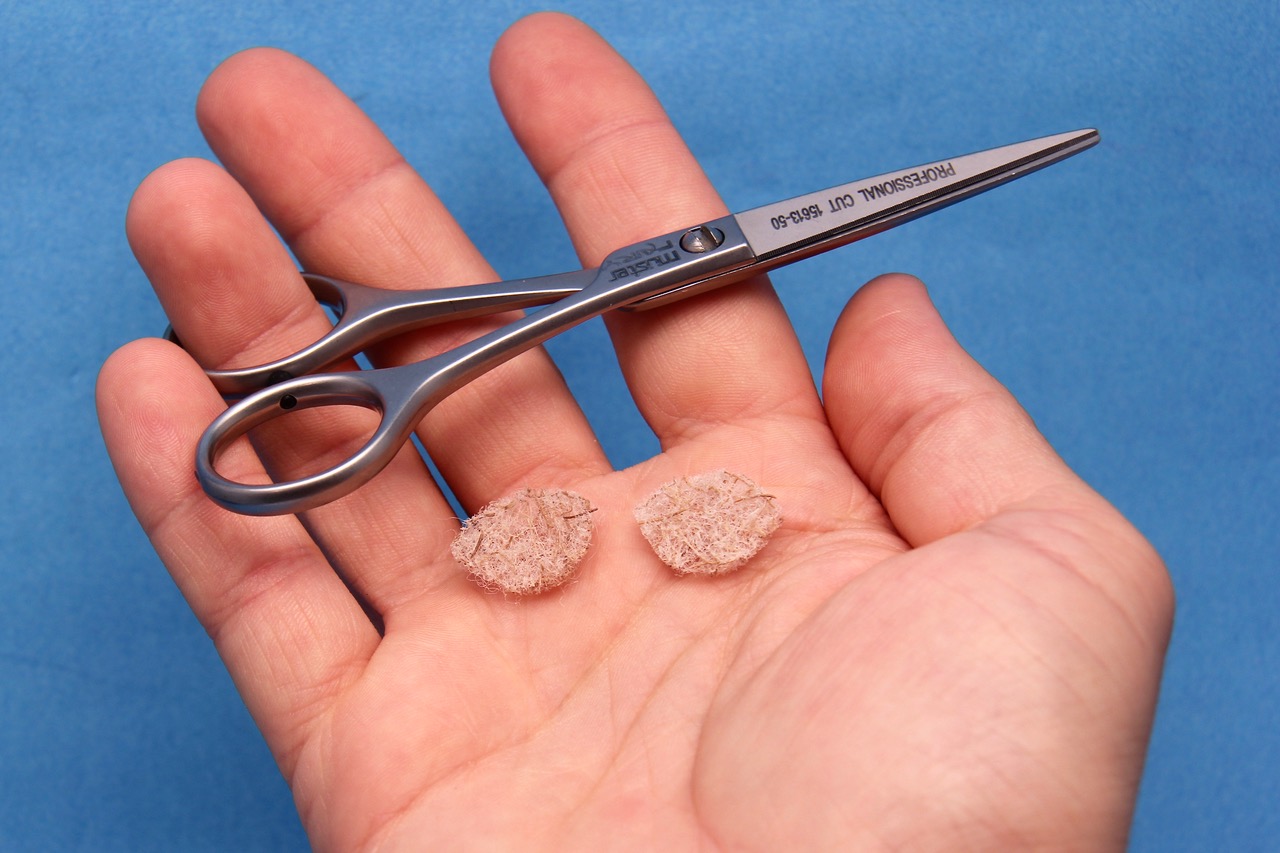
Using a crab-shaped cutter, stamp out the shell of the crab from a sheet of Scotch-Brite, Greener Clean Non-Scratch Scour Pad. If you do not have a crab-shaped cutter, simply trace a dime on the pad and cut it with scissors.
Step 11:
Using a serrated knife or micro-serrated scissors, carefully cut the pad in half from end to end.
Step 12:
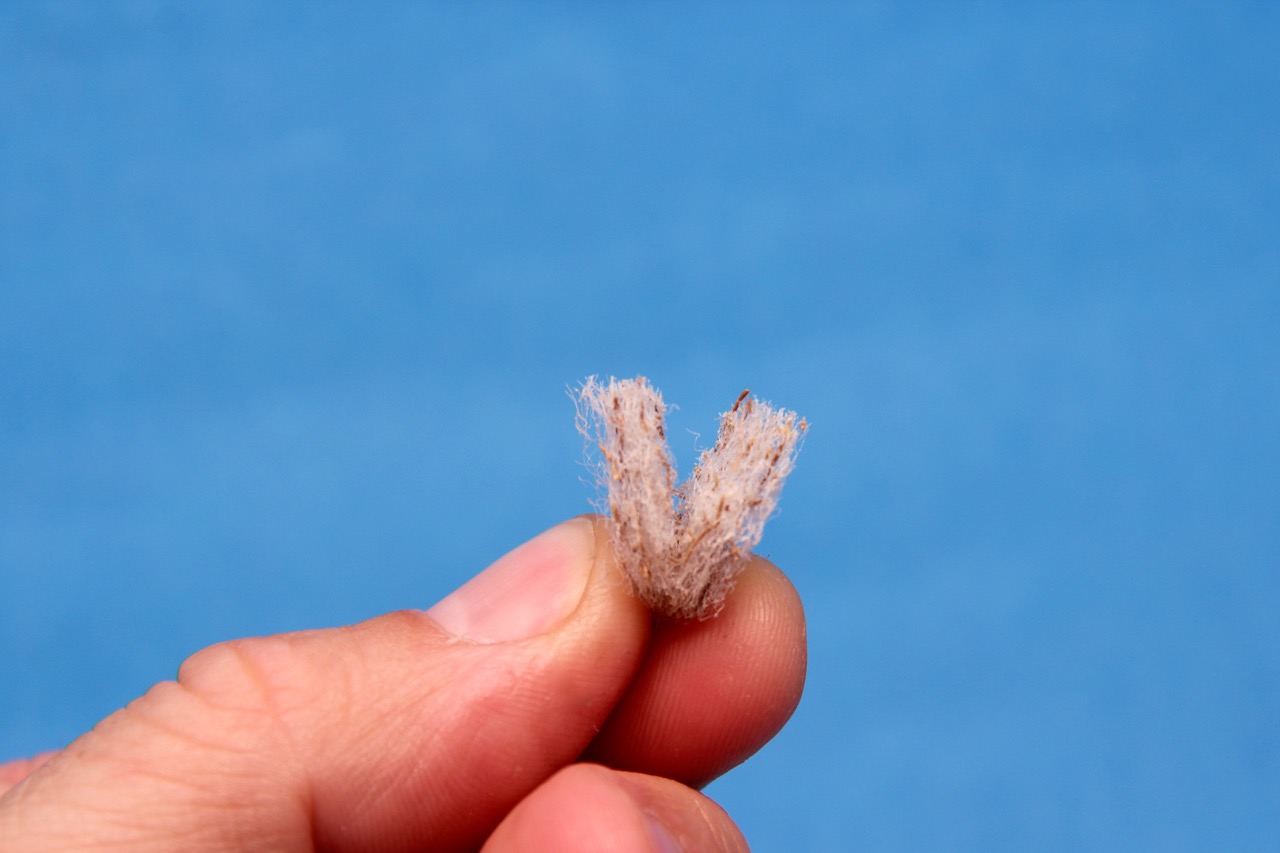
When you are finished, you should have two matching crab bodies, half the width of the original pad. This is essential, because the original pad is too thick and will impede the gape of the hook when the crab is assembled.
Step 13:
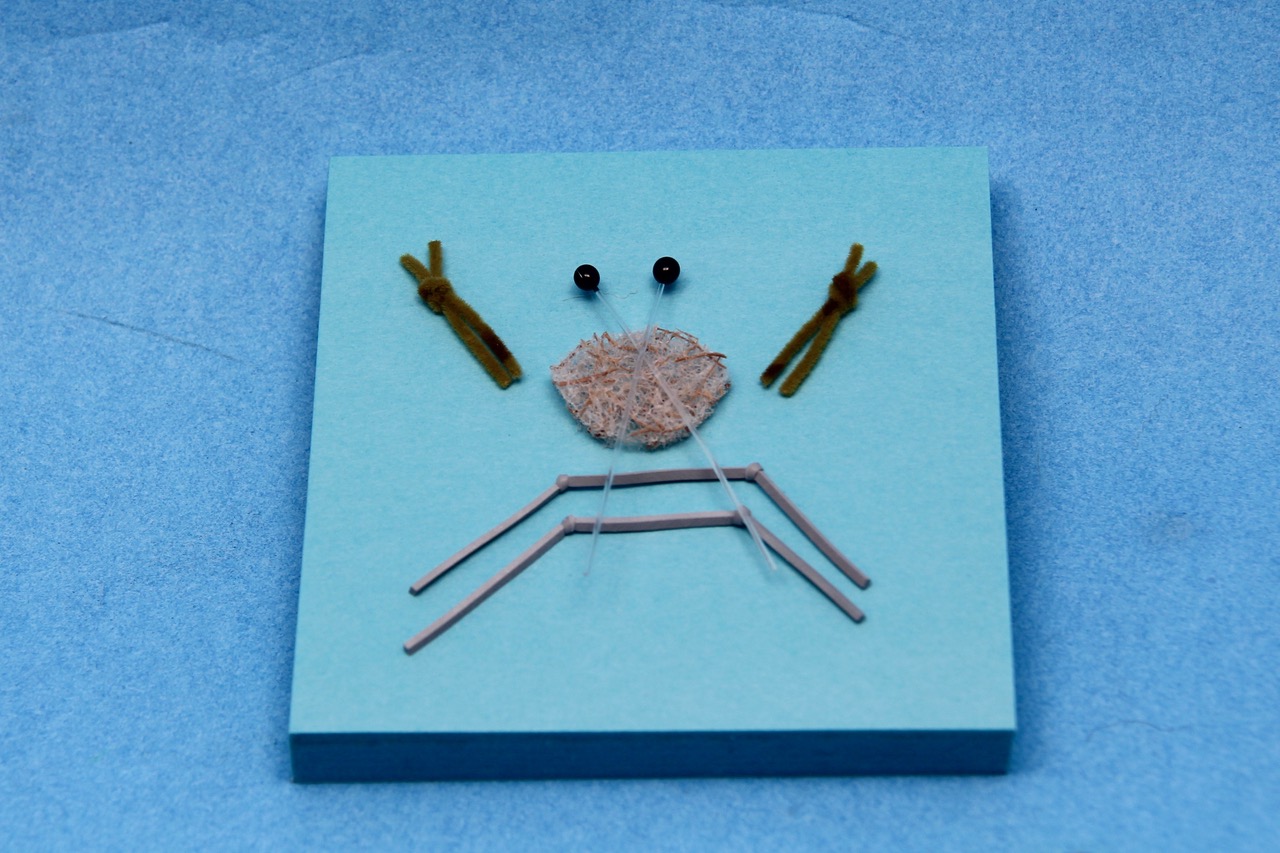
Layout all the parts of the crab to be assembled. The rubber leg with the knots closer together will be positioned below the other leg. Trim the longer portions of the claws slightly, so they will fit onto the body of the crab.
Step 14:
Place a pea-sized bead of E6000 glue in the middle of the Scotch-Brite Pad.
Step 15:
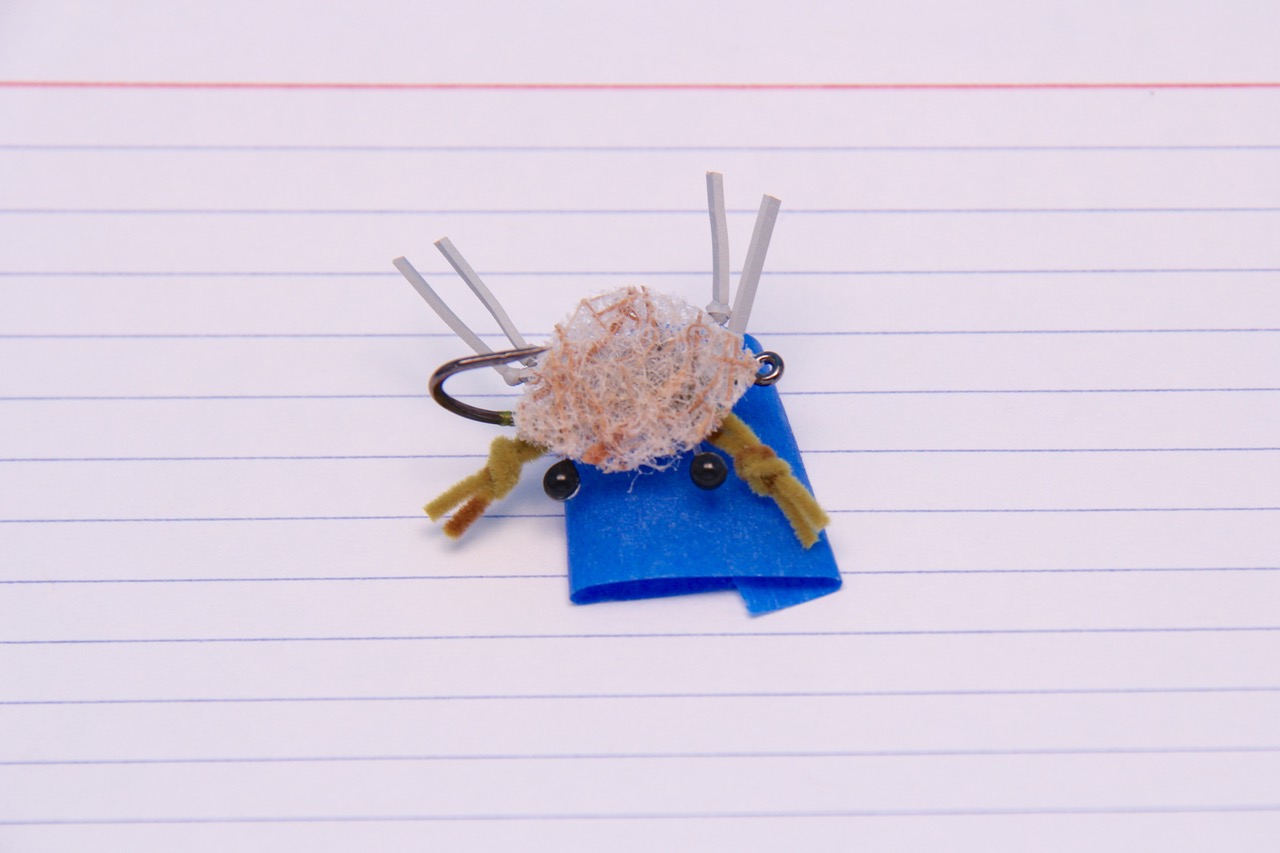
Begin assembly by laying the pair of EP Shrimp& Crab Eyes in to the glue. Cut away the portion of the mono post that sticks out beyond the Scotch-Brite Pad. The black eye should stick out slightly, beyond the body. The butts of the mono post should be angled to create a V shape. Next, place the legs into the glue so that the segmented portions beyond the knots point backward in the same direction. Complete the assembly by placing the claws at a 45-degree angle. The knots of the claws should stick out beyond the Scotch-Brite Pad and line up approximately with the eyes. Set aside to dry.
Step 16:
After the body assembly is completely dry, place the hook in the vise, point up. Place a pea-sized bead of glue on top of the hook and above the dumbbell eyes.
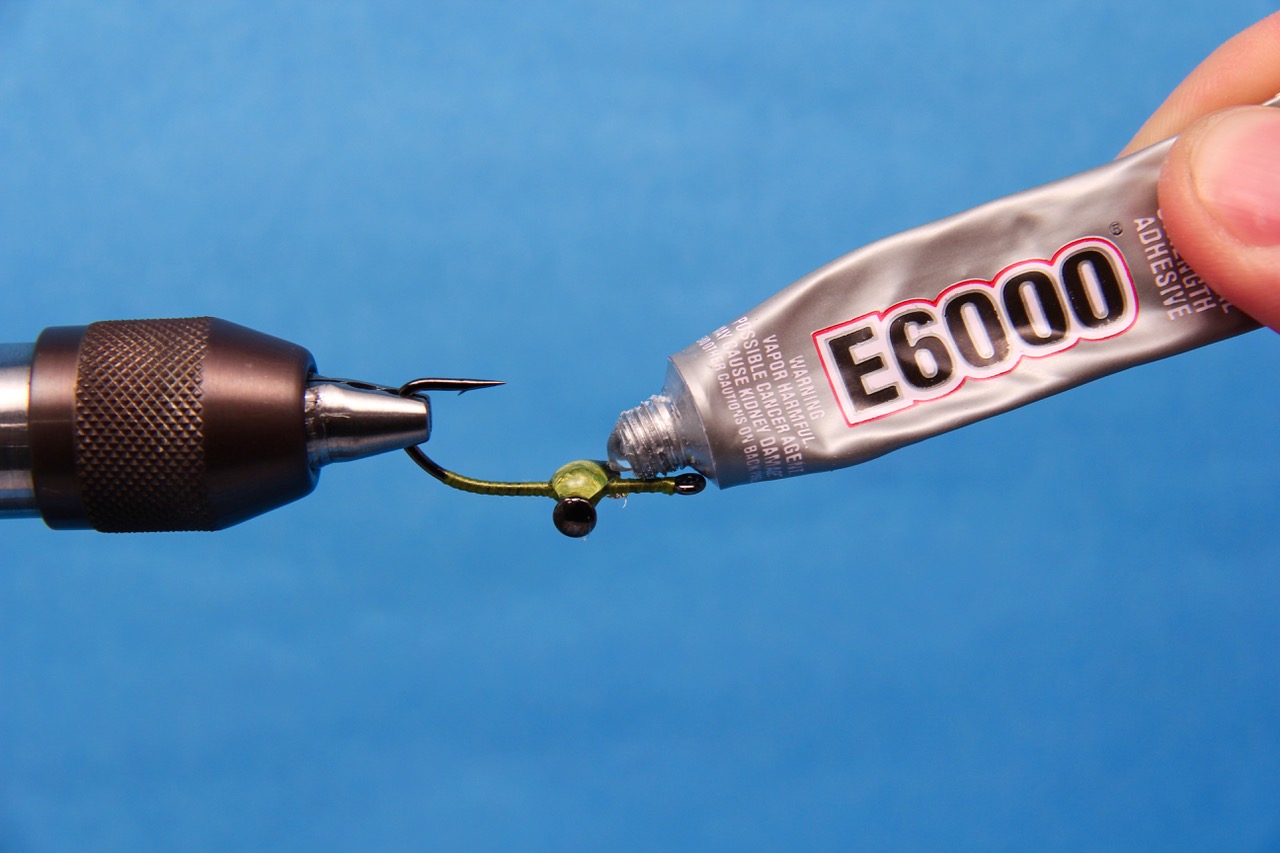
Step 17:
Center the body of the crab on top of the dumbbell eye.
Step 18:
Using a bodkin, spread the glue evenly on the exposed thread wraps and dumbbell eyes. This will create a much better bond between the body and the hook.
Step 19:
With your index finger, press and hold the body in place for 20 to 30 seconds until the glue starts to set up. Make sure that the body does not cover the eye of the hook.
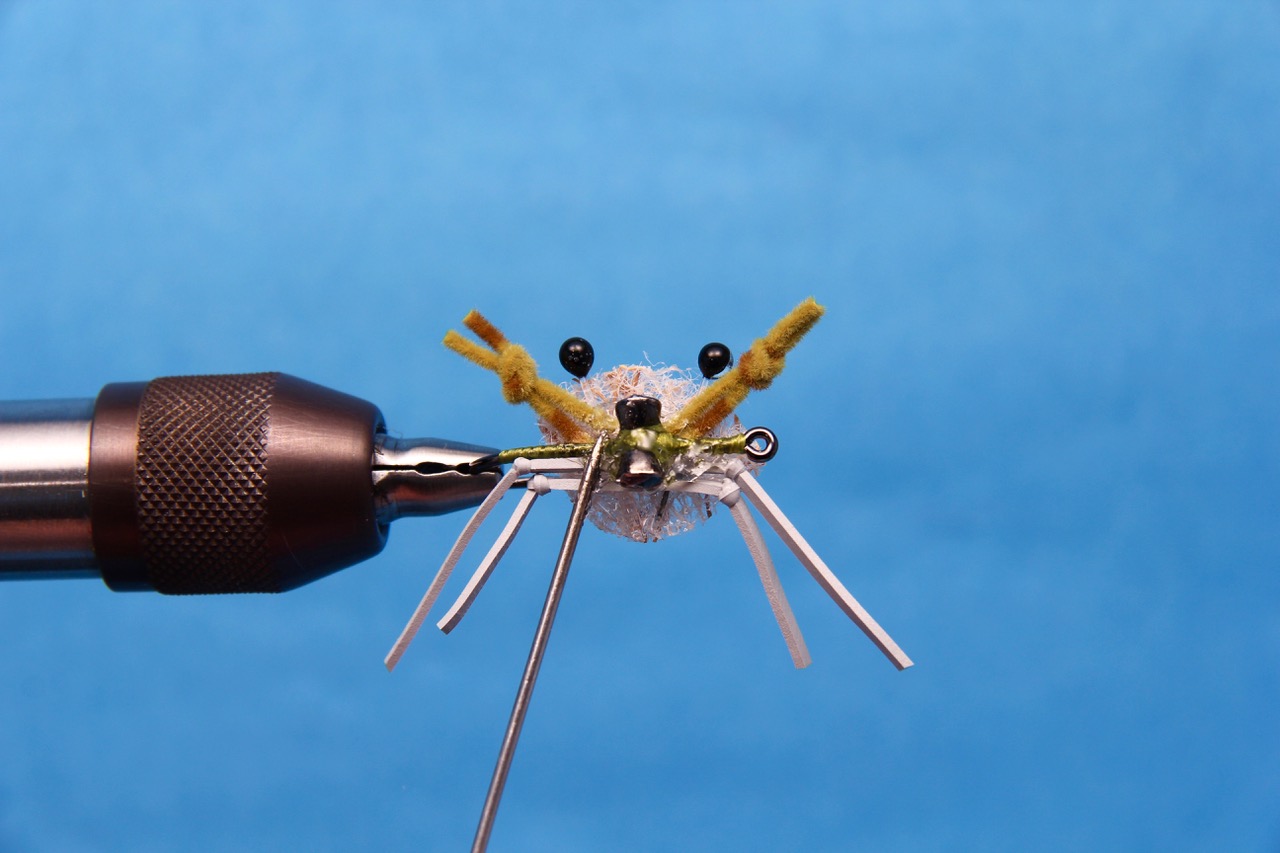
Step 20:
Once the glue is thoroughly dry, trim the segmented portions of the leg to approximately half an inch.
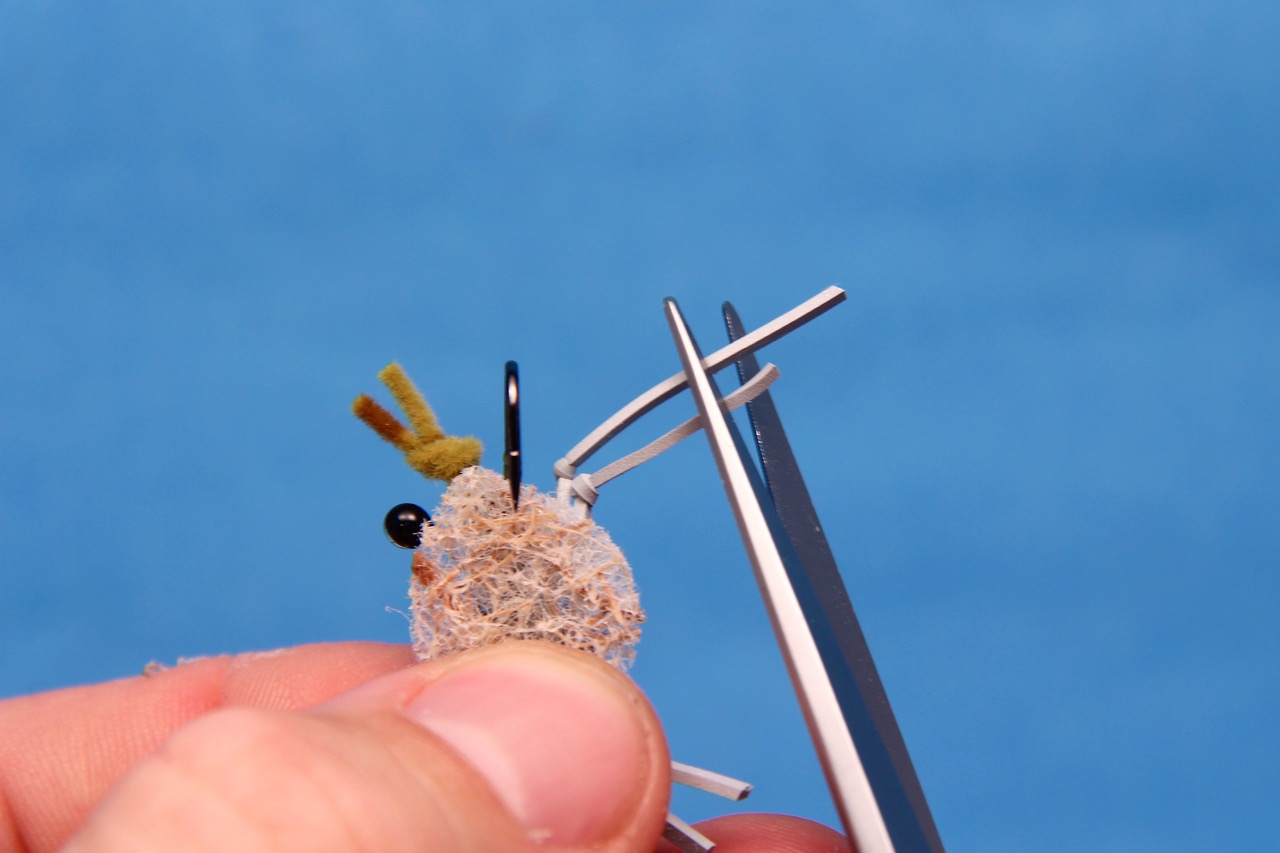
Step 21:
Place a loop of blue painters tape on an index card and stick the crab to the tape on top. This will keep the fly from blowing away when coloring it with the Copic airbrush or markers.
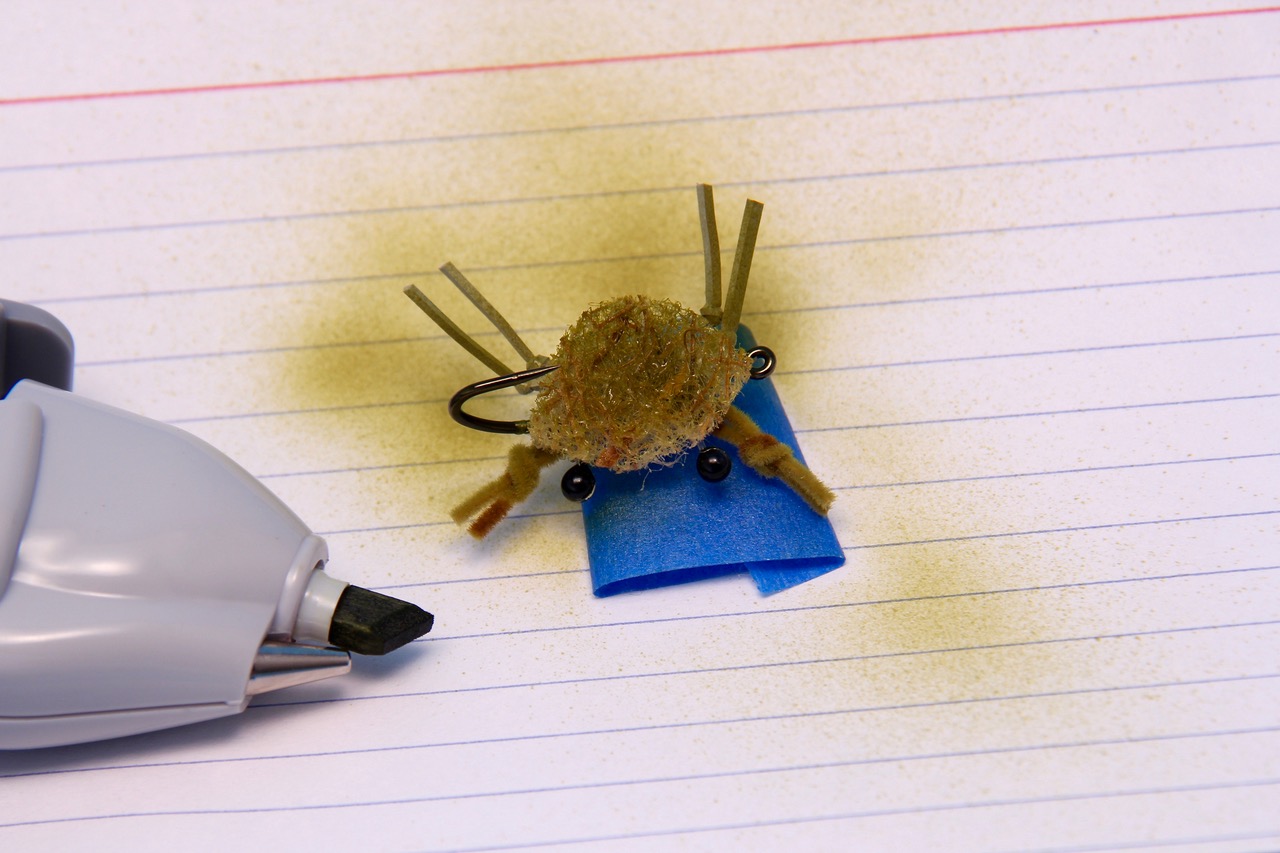
Step 22:
Select your color of choice, and spray the shell and legs of the crab. If you do not have an Airbrush, mark these portions with a permanent marker.
Step 23:
Allow ample time to dry, then turn the fly over and color the underside of the crab.

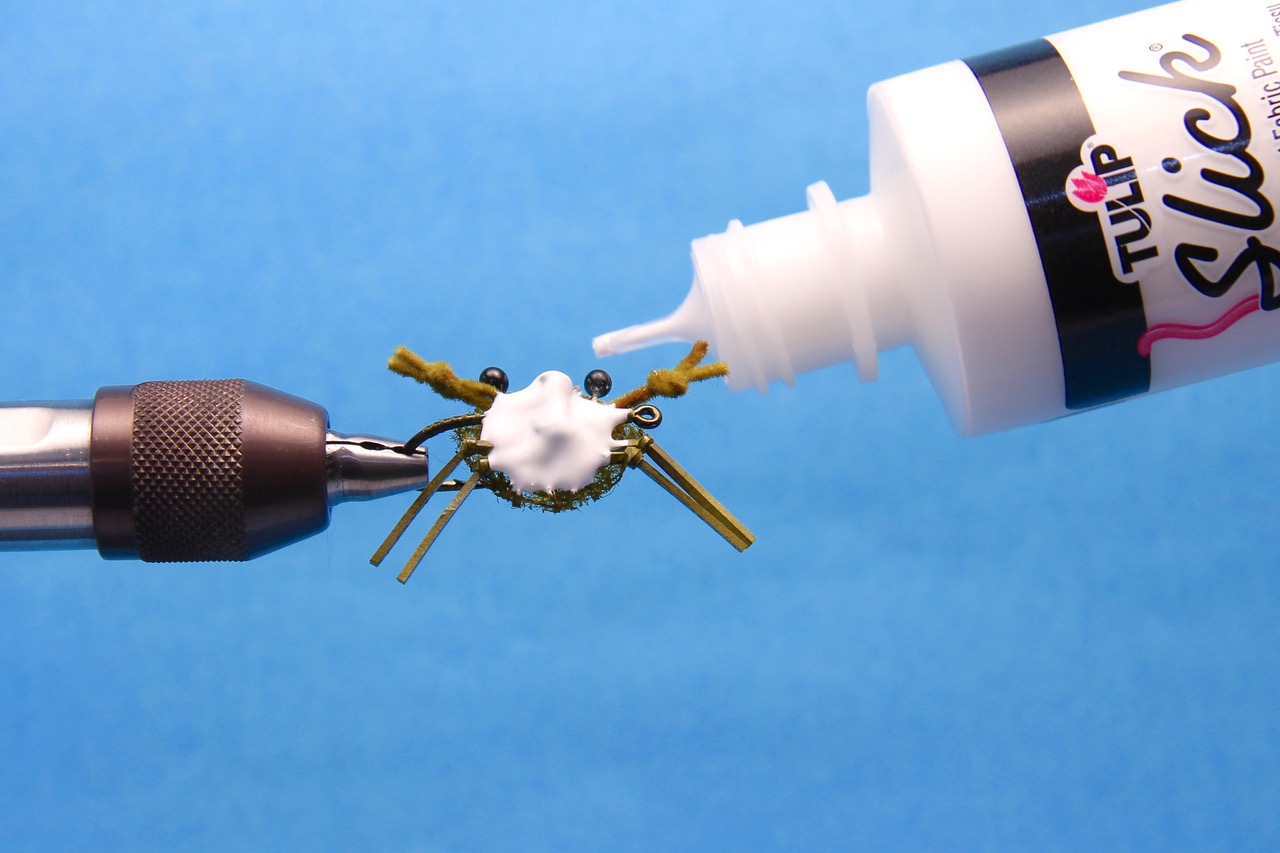
Step 24:
Cover the exposed thread wraps and dumbbell eyes with a thin layer of fabric paint. Most crabs are white on the underside, but feel free to match the fabric paint color to the crabs you are trying to imitate.
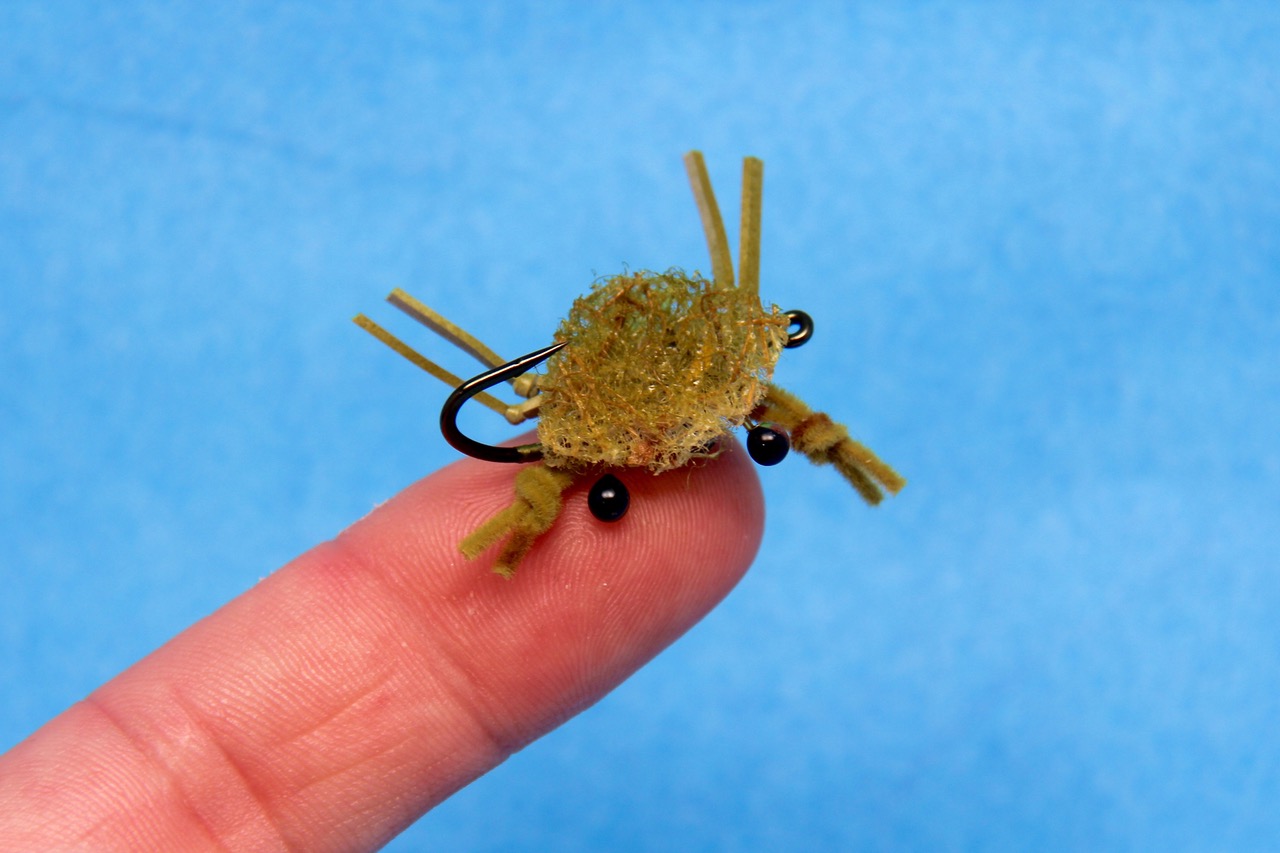
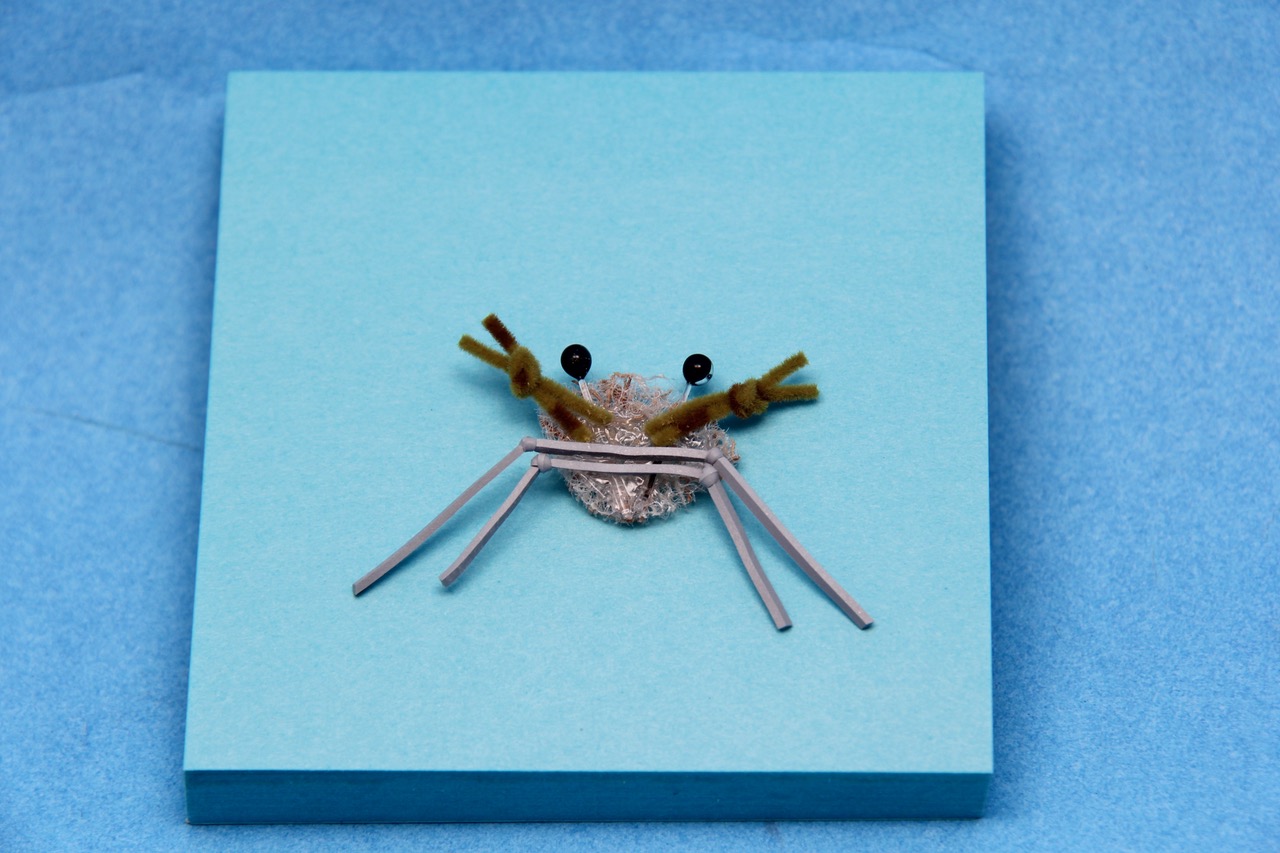
Completed Contraband Crab